NOTE: If you get the warning about this page wanting to run scripts or an ActiveX control, it's because of a couple javascript routines to play sounds, display a cursor, graphics, or improve navigation. There are no ActiveX routines associated with this page. I don't do viruses or hacker crap, but it's your choice...You won't miss anything important by refusing permission.

PAGE 1

HOW TO BUILD A $10 PLANS HOLDER

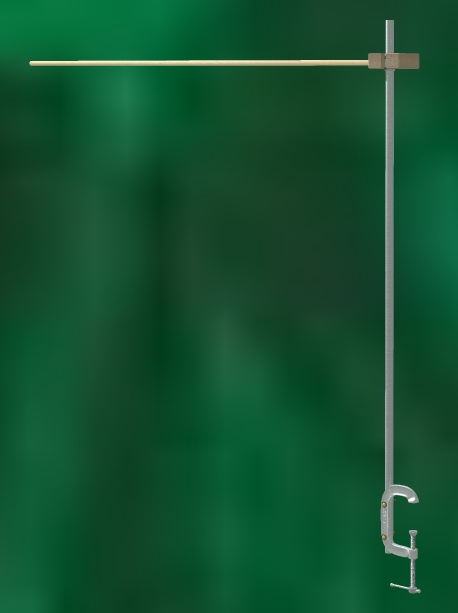
CG Plans Holder
INTRODUCTION

Put together one model ship kit and you quickly tire of wrestling with those forty inch sheets of plans while you're trying to focus on detail work.

If you have a convenient wall, you can attach the plans there. MicroMark sells a, no doubt, very nice plan holder for forty bucks. It looks to be of very simple construction and I wanted to duplicate it as closely as practical.

Feeling cheap, I looked around my garage to see what might serve the purpose.

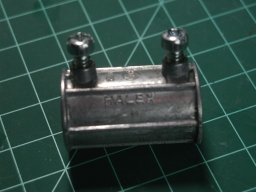
I wanted to be able to adjust the height and directional angle of the arm to which the plans are clipped. That meant tubing and some sort of set screw or thumb screw mechanism. A length of EMT (Electrical Metal Tubing) and a set-screw EMT coupler met the criteria.

The MicroMark original has a 36 inch upright and arm. I measured some plan sheets up to 40 inches. The design below will accomodate plans up to approximately 45 inches in width.

MATERIALS

  • one 3 inch C-clamp. (Pick a size that suits the depth of your worktable's top.) $3.00
  • 1/2 inch EMT - 48 inches. $2.00 for a ten foot piece
  • one 1/2 inch EMT set-screw coupler. $0.50
  • 1/2 inch wooden dowel - 48 inches. $2.00 (Use a larger diameter dowel if you want a more rigid and stable arm; just be sure you have a drill bit in the same diameter.)
  • one piece scrap 2x4 or wooden block - 3 inches long
  • two roundhead machine screws, about 1 1/2 inches long
  • four flat washers
  • two hex nuts
  • Faststeel epoxy putty, or equivalent
  • wood glue
EMT coupler

Be sure you use the type of coupler shown in the photo, and not the type which is a steel tube with a crimped circumference.

NAVIGATE THIS TUTORIAL USING THE ICONS AT THE BOTTOM OF EACH PAGE, OR THE index dropdown DROPDOWN AT THE TOP.

The tools you choose are up to you, as is their safe use. Wear proper protective gear and educate yourself in all appropriate safety precautions before working with the tools and materials.


NEXT PAGENEXT PAGE - STEPS

bilagaana's Home Page

more stuff from bilagaana

All original contents copyright bilagaana. All rights reserved.

This page uses the optional Paddington font.
The CG plans holder and components were rendered in good old Ray Dream Studio.