|
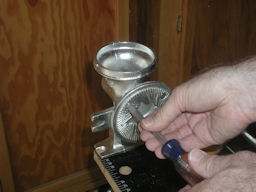
- Start by removing the inner grinding plate from the mill and put the machine screws somewhere you won't lose them.
| |
|
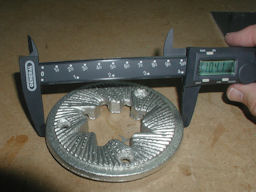
- The grinding plate we're replacing is about 4 inches (104 mm) diameter to the outside edge. The central hole is 2 inches (50.8 mm) diameter at it's widest points.
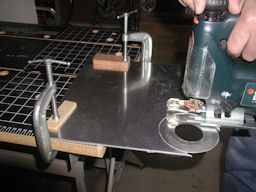
- You can use the grinding plate you just removed to trace the outside circumference onto the aluminum sheet but it's a bit awkward. Better to use a compass or cut a pattern and trace that.
| |
|
- Cut out the central hole first, or you'll wish you had. I clamped the sheet of aluminum to a workbench so that most of it projected over the edge.
| |
|
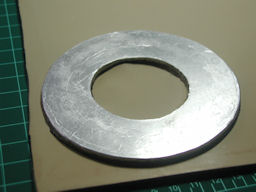
- After you've cut out the disk, deburr and smooth the cut surfaces.
|
|
|
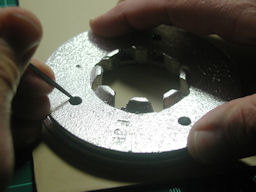
- Use the original grinding plate as a template to mark the position of the screw holes and then find the centers of each hole. (I used a very sharp leather awl to scribe the circles.) Mark the hole centers with a center punch.
The placement of these holes must be as precise as possible, as they must exactly match the screw holes on the body of the mill. Note that these holes are not evenly spaced around the circumference. There is only one correct orientation for either the original grinding plate or the dehuller attachment.
|
 |
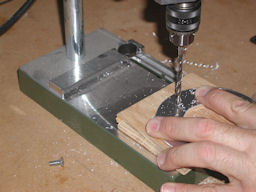
- With a drill press, drill 3/16 inch (4.76 mm) holes at each marked center. If you're very careful and can secure the two disks on the work surface of the drill press so that there is no possibility of their slipping in relation to each other, you could skip tracing the screw holes and use the original grinding plate as a drill guide. On my hobby sized drill press that wasn't practical.
|
 |
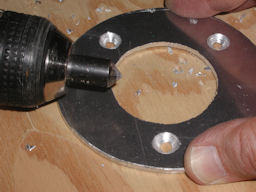
-
Countersink each hole, preferably using a countersink bit.
|
 |

